In spring 2020 all teachers suddenly had to face the same challenge: switch their classes to online-teaching within the shortest amount of time. When I first heard about this, my first thought was: I’m sure it will never work with hands-on prototyping! But now, after the term has finished, it’s safe to say it worked out surprisingly well. Yet, it took a lot of time, try & error, and advice from other teachers to figure out the best way of doing it. So, in the hope this knowledge might be useful to other teachers facing similar problems (and we will be facing them for a while now…), I would like to share the tricks & tools which worked out well for me during this crazy first corona term.
1. Send out materials for prototyping ahead of the course.
Make sure every student gets a “first-aid kit”: a minimal set of materials for your course, something to get started. Either ship materials to them, or hand out a list and let them buy all materials individually.

2. Tech Set-up: Make it as easy as possible for yourself.
In the beginning I’ve been testing so many different things (like connecting my DSLR camera and live-streaming to my shared screen), but switching between too many programs and tabs made everything very complicated and required too much attention, so that it distracted me from the content.
So here is my advice: don’t choose too many different tools or you will get lost in the process of actual teaching. Also: plan out which tools and programs you want to use for a specific content, open all tabs in advance, keep all links you want to share in one place. If you use multiple screens, you might want to decide in advance which screen is for sharing and which screen is for your notes and then open all windows where you need them in advance. Also keep in mind that you need some screen space for your video call, and you probably want to see all of your students at once. In general, the tech requirements should distract you as little as possible during your class.
3. Make use of digital tools to actively engage students.
It can be really hard to keep students’ attention in an online course. This is probably just as true for offline teaching, but keeping it fresh by switching between various teaching formats and types of content is especially important online – we alternated short student presentations, projects from the art & design scene, discussions and hands-on activities (approx. every 30min to 1h).
Sometimes an attention activation through simple tricks can make wonders! My favourite is this one: ask students to type a short answer to a simple question in the group chat, but without clicking “send” just yet. (A question like: three things that come to your mind when you hear the term “open-source”) Then make a count-down, and on “0” everybody should click on “send”. The benefit is that you get the results incredibly quickly AND from ALL your participants. You can scan through all the answers just as quickly, and, if you want to, pick out the most interesting ones and discuss them.
4. Make use of the analog space to actively engage students.
As everyone was confined to her/his four walls during the lock-down, it was actually fun to explore the different materials everybody had at their disposal at home DURING the class, (not as a homework), and then come back all together and show-case the finds. Take these limitations as an inspiration and try to make use of it!
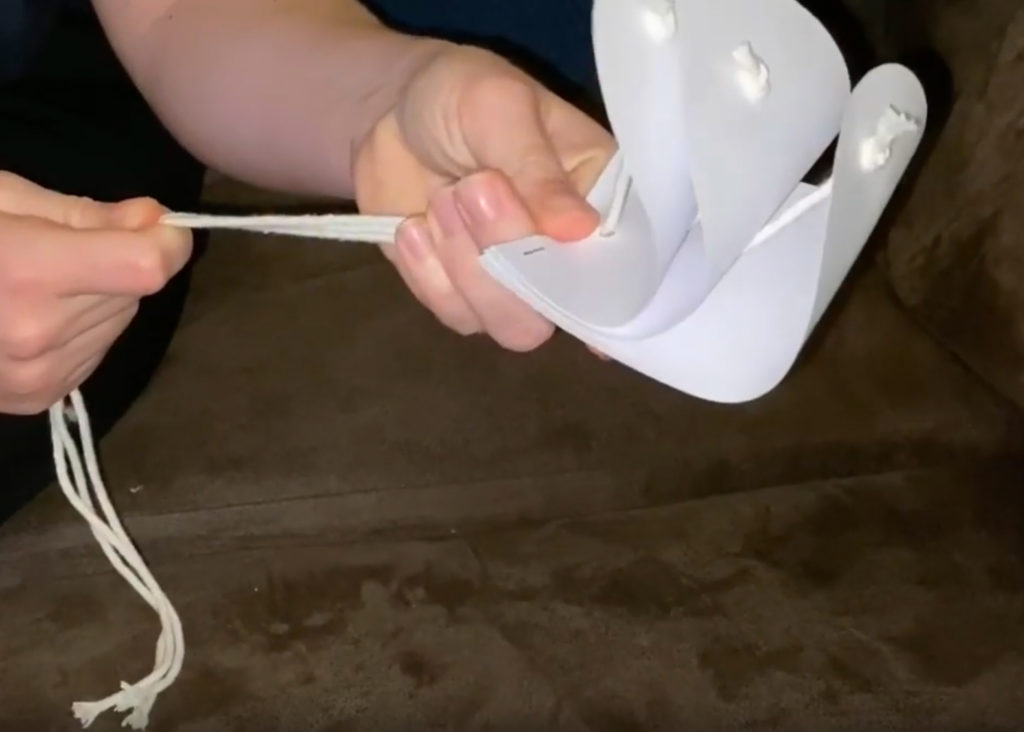
I was hugely inspired by Hannah Perner Wilson, who decided to stick to basic household materials for prototyping like noodles, ribbons, etc. (and btw. transformed her entire course into a board game!), or by Becca Rose who made switches out of spoons and coins. In my course I asked students to incorporate conductive materials they could find at home (e.g. aluminium foil), to go on a “conductivity” hunt with a DIY-bracelet (an activity borrowed from Hannah Perner-Wilson’s and Irene Posch’s class), or to disassemble old electronic devices and clothes.

5. Create common digital spaces:
Another simple trick, which worked wonders for me: Let all participants collaborate in ONE online document! I used Google Docs, and this gave a great sense of community in my class, as everyone was literally on the same page. And another nice bonus: I could immediately see everyone’s progress without having to ask every single student!
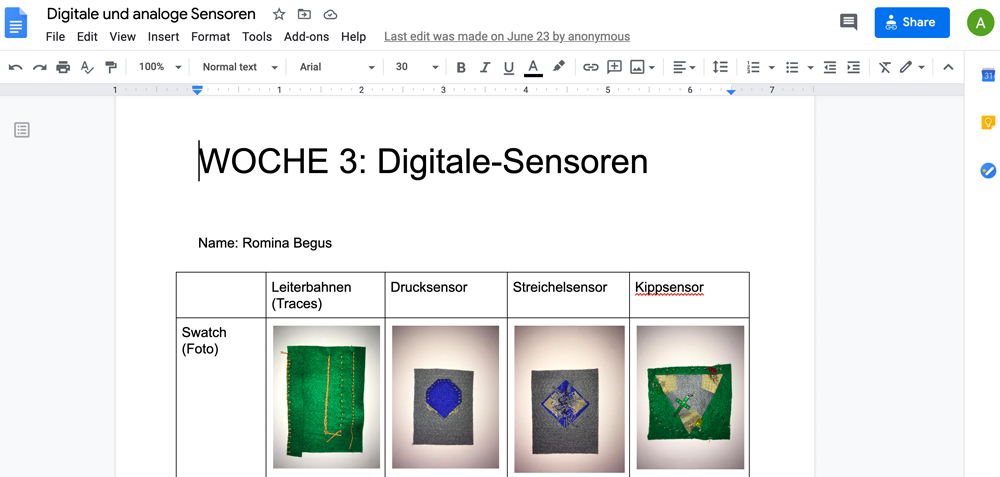
I also used Google Docs as an equivalent of a table in the centre of the classroom – a space for coming together to show-case and discuss each other’s work. I asked each student to take pictures of what they’ve made and copy them into one file. (E.g. we collected e-textile sensors here.) I’m sure there must be more sophisticated and suitable tools for that than Google Docs – please feel free to share your suggestions in the comments.
6. Pre-record content
What worked astonishingly well – a series of short pre-recorded video tutorials for hands-on activities (in my case: soft circuits and e-textile sensors). This allowed students to work at their own pace and have control over their own progress. This format was very well received by all students!
7. Invite sudents to work on hands-on projects in groups, even if they can only work remotely.
Even during the strictest lock-down I made sure that students were encouraged to form small groups for all of their projects or assignments. Studying online is lonely enough, so any kind of exchange is fruitful and mutually inspiring. This group strategy is also how I work when teaching offline. But the nice bonus of online teaching is that instead of a single group prototype each group member delivered their individual prototype, thus enriching their concepts with multiple perspectives and aesthetics!


Unexpected positives:
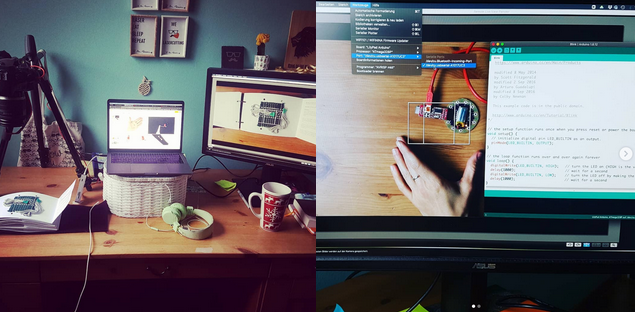
E-textiles and electronics in general can be very intricate and small, and the processes are often hard to follow for a big group of people. When I’m teaching offline and want to show the students how a certain stitch or a microcontroller connection works, I often need to go around the classroom to bring the sample close to each student, or show the process itself individually. This turned out to be a blessing in the digital world! I could share even the smallest details live on my screen, visible to all participants at once! And even better: I could place my live-recording of a physical tech set-up next to the window with the code on a shared screen! A win-win!
Unexpected negatives:
What I didn’t expect was that most of the students had their cameras switched off most of or all the time. (due to bad internet connection, lack of tech, discomfort or what have you). And the trouble is – I’ve never met my students in real life before. This made teaching online incredibly exhausting! It made me realise how much feedback information our brain processes without us actually noticing it: as teachers we constantly evaluate how well we are performing, based on student’s facial expressions and body language. And when this feedback loop disappears – it’s like you keep sending all the energy through the screen but nothing is ever coming back…
How did I get the hang of it? For my own sake, I made sure I let every single participant speak at least at one point of our weekly 4.5h session – just to hear everyone’s voice for my own sanity…
How did you come around the challenges of online-teaching, and what are your secret weapons? Please share in the comments – I would love to know!
By the way, the entire documentation & syllabus of my course can be found here.
Leave a Reply
You must be logged in to post a comment.